INSTALLED IN 15 MINUTES
Four steps — no technician, no special tools. That's how 9 out of 10 of our customers do it.
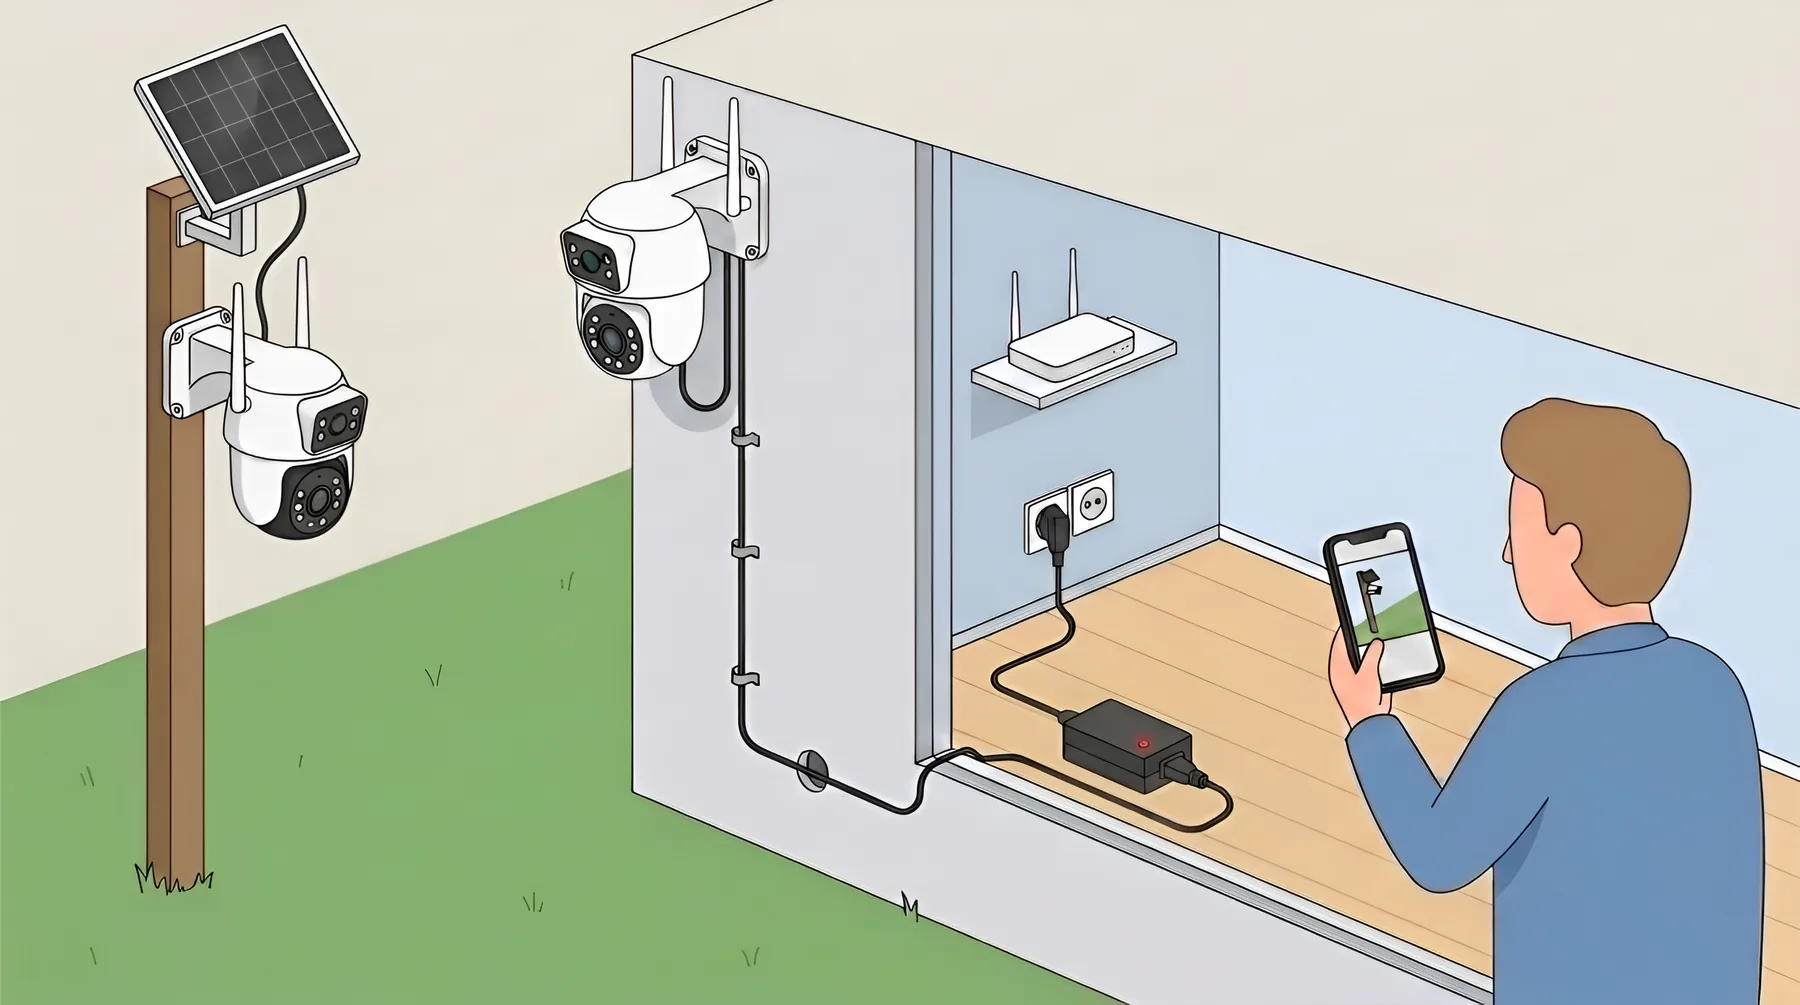
Tap a dot to see a tip
On the wall or under the roof, 2.5–3 m high. Bracket and screws are in the box.
- 1
Mount the camera
≈ 5 minutesBracket and screws are in the box. Wall, pole or ceiling — 2.5–3 m high, tilted slightly down.
- 2
Connect power
≈ 2 minutesThe adapter stays indoors; only the cable runs outside.
- Socket nearby → adapter from the box
- Socket far away → DC extension 3–15 m
- No electricity → solar-powered model
- 3
Provide internet
≈ 1 minuteThe camera needs internet to stream video to your phone.
- Wi-Fi available → 2.4 GHz network, password
- No Wi-Fi → SIM card with a 10–30 GB plan
- 4
Pair with your phone
≈ 5 minutesInstall the app named on the box, scan the QR code on the camera — and it's on your phone.
Watch the camera from anywhere, get motion alerts; recordings are stored on the memory card.
How to run the cable
The cable from the adapter to the camera is the only place to get wrong. Five rules that prevent 90% of problems.
- 1
Fix the cable with clips
Round nail-in cable clips from any hardware store, sized for 5–6 mm cable, every 30–50 cm. On brick and concrete — plug-in cable ties.
- 2
Leave a drip loop at the camera
Let the cable sag downward just before it enters the camera. Water runs along the cable and drips off the loop instead of into the connector.
- 3
Outdoor joints only in protection
Wrap the joint between the camera cable and the extension in insulating tape and put it in a sealed junction box, or at least under a canopy. An open connector in the rain is the most common cause of “camera offline”.
- 4
Through the wall — sloping outward
Drill the hole with a slight downward slope toward the outside so water can't run into the house. Seal it outside. The adapter goes into a socket indoors.
- 5
On a pole — adapter not at the top
Run the cable down the pole with ties and put the adapter indoors or in a sealed box with a socket at the base. An adapter in the open fails and voids the warranty.
- 6
Don't cut or splice the cable
A splice draws moisture and gives poor contact. Need length — use a DC extension with sealed connectors: 3, 5, 10 or 15 m.